A beginner-friendly way to make one good idea work harder without starting from scratch every time.
You finally publish the blog post.
For a moment, it feels good.
The page is live. The idea is finished. You can breathe again.
Then the next question shows up.
“What do I write next?”
And just like that, the blank-page feeling returns.
It can feel like cleaning one room, turning around, and seeing another messy room waiting behind you.
But here’s the better news.
You may not need a brand-new idea right away.
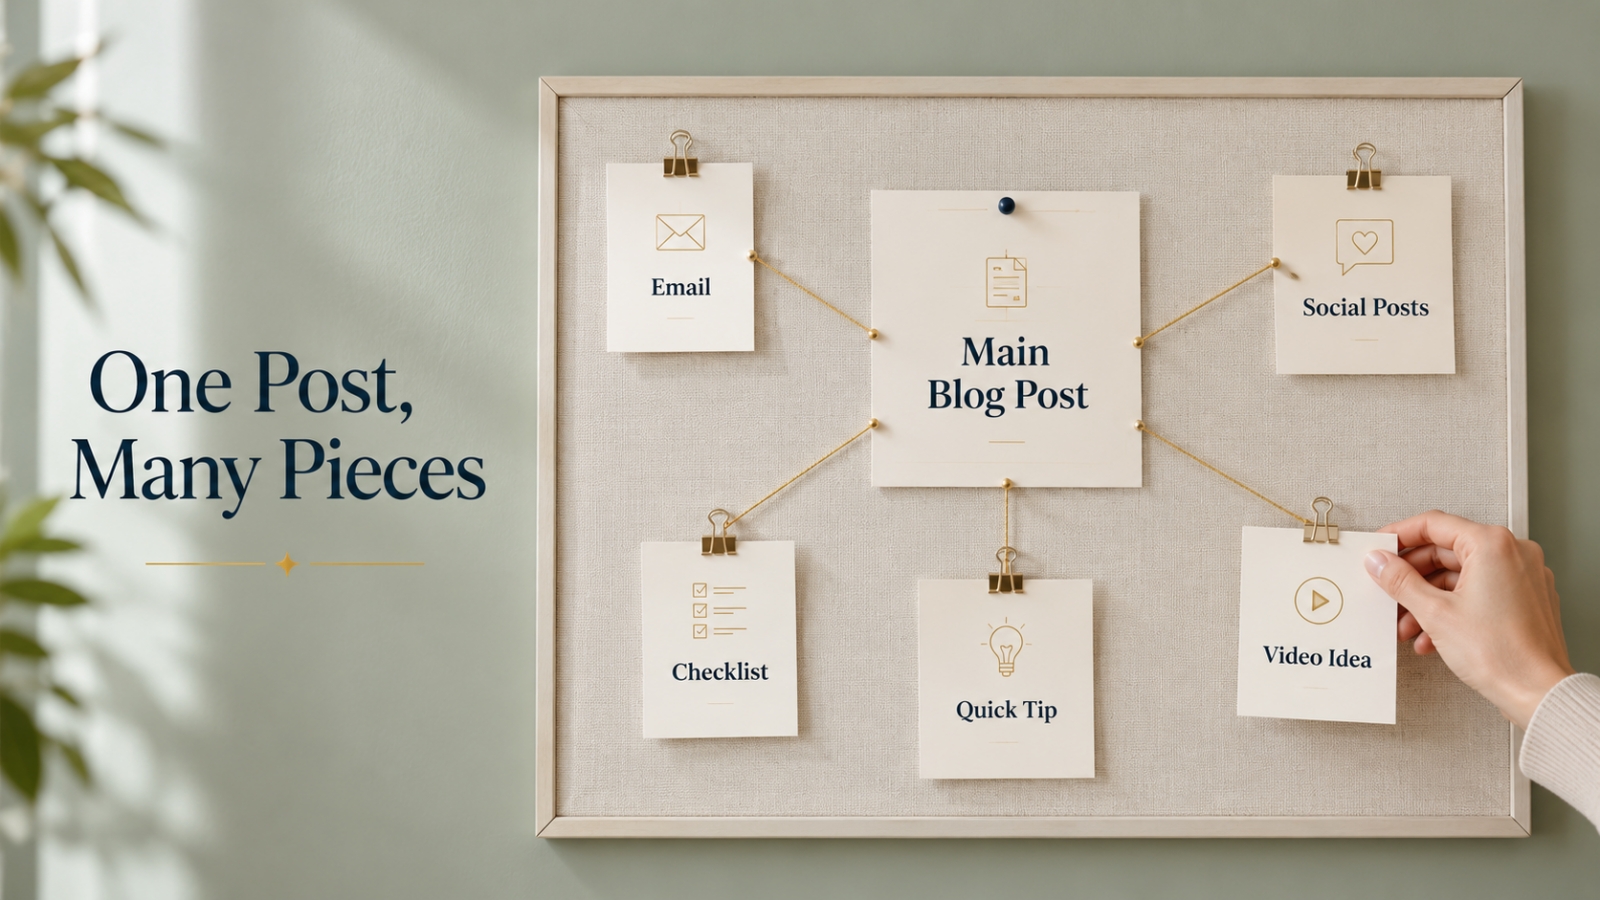
Sometimes, one strong blog post has more life in it than you think. It can become an email, a few social posts, a checklist, a short tip, or even a simple video idea.
That is the heart of content repurposing.
Nothing fancy.
Nothing complicated.
Just one useful idea reshaped into a few helpful formats.
Why One Blog Post Shouldn’t Be the End of the Idea
Many beginner bloggers treat every post like a one-time task.
Write it.
Publish it.
Move on.
Then they start all over again.
That creates pressure because every email, social post, or video idea feels like another fresh mountain to climb.
But a helpful blog post is not just one article.
It is a core idea.
And if that idea is useful, you can share it in more than one way.
Think of it like organizing a messy drawer.
You do not just pull out one item and walk away. You sort, group, remove, tidy, and place things where they are easier to find.
Your content can work the same way.
One blog post may contain:
- one strong lesson
- one useful checklist
- one relatable story
- one mistake to avoid
- one simple method
- one quick tip worth repeating
Each of those can become a smaller content piece.
You are not repeating yourself like a broken record.
You are making your best ideas easier to find, easier to understand, and easier to use.
The Big Mistake Beginners Make
The big mistake is creating every content piece from scratch.
A fresh article.
A fresh email.
A fresh social post.
A fresh video idea.
A fresh tip.
A fresh everything.
No wonder content creation starts to feel heavy.
It is like cooking a full meal every time someone asks for a snack.
A better way is to start with one strong blog post and pull smaller pieces from it.
That gives you more useful content without forcing you to squeeze another idea out of thin air.
And for many beginners, this is where the pressure starts to lift.
You realize you do not need ten new ideas by next Monday.
You may only need one good post and a few smart ways to reuse it.
The One-Post Content Map
Let’s keep this simple.
Start with one blog post.
Then turn it into five smaller content pieces:
- One short email
- Three social posts
- One checklist
- One quick tip
- One video or audio idea
That is enough for most beginners.
You do not need a giant content machine.
You only need a simple way to reuse one good idea with purpose.
Step 1: Start With One Clear Blog Post
Before you repurpose anything, choose one blog post with a clear lesson.
For this example, let’s use a home organization topic:
Blog Post Idea:
How to Organize One Messy Kitchen Drawer in 15 Minutes
This is a strong starting post because it is specific.
It does not try to organize the whole house.
It does not even try to organize the whole kitchen.
It opens one drawer and says:
“Let’s start here.”
That is why the example works.
It has:
- one reader
- one problem
- one small task
- one clear outcome
The reader is not trying to become a home organization expert.
They just want to fix one messy drawer that annoys them every day.
Before you repurpose your own post, ask:
What is the main lesson here?
For our example, the main lesson could be:
You can make a messy space feel easier to manage by starting with one small area and sorting it step by step.
That single lesson can now become several content pieces.
Step 2: Turn the Main Lesson Into One Email
An email does not need to repeat the full blog post.
In fact, it should not.
Your email only needs to open the idea in a warm, personal way.
For the kitchen drawer example, the email could start with a real-life moment.
You open the drawer.
Something gets stuck.
A spoon is hiding under takeaway menus. A rubber band appears from nowhere. A few random batteries roll to the back.
You sigh and close the drawer again.
We have all had a drawer like that.
That tiny scene makes the email feel familiar.
Then the email can share one simple lesson:
You do not need to organize your entire kitchen to feel better. Start with one drawer. Give yourself 15 minutes. Remove what does not belong. Group what stays.
That is enough for one email.
Email Angle
One messy drawer can make the whole kitchen feel harder to use.
Email Purpose
Help the reader feel understood, teach one small idea, and invite them to read the full guide.
Simple Email CTA
Read the full guide to see the 15-minute drawer reset method.
Small wins matter.
One clean drawer can make the whole kitchen feel less annoying.
In the same way, one clear blog post can make your whole content week feel lighter.
Step 3: Turn the Blog Post Into Three Social Posts
A good blog post usually has several smaller ideas inside it.
Each small idea can become a social post.
For the kitchen drawer example, you could create three posts from three different angles.
Social Post 1: The Pain Point
A messy kitchen drawer is not just messy.
It slows you down every time you cook, pack lunch, or look for one small tool.
This post connects with the reader’s frustration.
It says:
“Yes, I know that feeling.”
Social Post 2: The Quick Tip
Set a 15-minute timer and organize only one drawer.
Not the whole kitchen.
Not every cabinet.
Just one drawer.
This post gives a simple action.
It feels doable.
Social Post 3: The Common Mistake
One mistake people make when organizing is pulling apart too many areas at once.
Start smaller.
Finish one space.
Then move on.
This post teaches through a mistake, which often works well because readers recognize themselves in it.
Notice what happened?
You did not create three new topics.
You pulled three smaller ideas from one post:
- the pain point
- the quick tip
- the common mistake
That is repurposing in plain English.
One article.
Three useful angles.
Step 4: Turn the Steps Into a Checklist
If your blog post teaches a process, you can usually turn that process into a checklist.
Readers like checklists because they remove guesswork.
They do not have to remember the whole article.
They can simply follow the steps.
For the kitchen drawer example, the checklist could look like this:
15-Minute Kitchen Drawer Reset Checklist
- Empty the drawer
- Throw away obvious rubbish
- Remove items that belong somewhere else
- Group similar items together
- Place the most-used items near the front
- Wipe the drawer quickly
- Put everything back neatly
This checklist could become:
- a printable download
- a social media carousel
- a short email insert
- a bonus resource
- a lead magnet idea
A checklist works because it turns the lesson into action.
It gives the reader something to do, not just something to read.
And that matters.
People remember content better when they use it.
Step 5: Pull Out One Quick Tip
A quick tip is a tiny piece of content.
It does not explain the whole article.
It gives the reader one useful reminder.
From the kitchen drawer post, one quick tip could be:
Quick Tip:
If you use something every day, keep it near the front of the drawer. If you rarely use it, move it further back or place it somewhere else.
That small idea could become:
- a short social post
- a simple graphic
- a quick email note
- a short video
- a reminder inside another article
Small tips are powerful because they feel easy.
And when something feels easy, readers are more likely to try it.
That is how trust begins.
Not from giant promises.
From small advice that actually helps.
Step 6: Turn the Post Into a Video or Audio Idea
You do not need a studio setup to turn a blog post into a video or audio idea.
You only need one simple talking point.
From the kitchen drawer article, the video idea could be:
Video Idea:
The 15-Minute Kitchen Drawer Reset
You could show or explain:
- what the drawer looked like before
- what you removed first
- how you grouped the remaining items
- what changed after 15 minutes
This could be a short video, a voice note, or a simple slide-based recording.
It does not have to be perfect.
That part is worth repeating.
It does not have to be perfect.
The point is to share the lesson in another format.
Some people like to read.
Some like to watch.
Some like quick reminders.
Repurposing helps you meet them in more than one way.
Worked Example: One Post Into Six Content Pieces
Let’s put the full example together.
Original Blog Post
How to Organize One Messy Kitchen Drawer in 15 Minutes
Main Lesson
A messy space becomes easier to handle when you start with one small area and finish one simple reset.
Repurposed Piece 1: Email
Angle:
One messy drawer can make the whole kitchen feel harder to use.
Purpose:
Connect with the frustration and invite the reader to the full guide.
Repurposed Piece 2: Social Post — Pain Point
A messy drawer slows you down because everything takes longer to find.
Repurposed Piece 3: Social Post — Quick Tip
Set a timer for 15 minutes and focus on only one drawer.
Repurposed Piece 4: Social Post — Mistake
Do not pull apart the whole kitchen when one small drawer is the real daily problem.
Repurposed Piece 5: Checklist
15-Minute Kitchen Drawer Reset Checklist
- Empty the drawer
- Remove rubbish
- Move misplaced items
- Group similar tools
- Keep daily-use items near the front
- Wipe and reset
Repurposed Piece 6: Video or Audio Idea
Show a before-and-after drawer reset and explain the three sorting choices.
Now you have six content pieces from one article.
No panic.
No blank-page battle.
No need to chase a brand-new idea every time.
Just one useful lesson, reshaped with care.
What to Leave Out When Repurposing
Repurposing does not mean squeezing the whole blog post into every format.
That makes smaller content feel heavy.
And honestly, it can bore readers.
Each format needs space to breathe.
In an Email
Use one idea, one short story, and one link to the full post.
In a Social Post
Use one sharp point, one quick tip, or one mistake.
In a Checklist
Use action steps only.
In a Video or Audio
Use one visual, one short story, or one talking point.
The goal is not to stuff the whole article into every corner of the internet.
The goal is to help the same idea travel well.
Common Mistakes to Avoid
Mistake 1: Copying the Same Words Everywhere
Copying and pasting the same paragraph into every platform can feel flat.
Repurposing works better when you adjust the angle.
An email can feel personal.
A social post can feel sharp.
A checklist can feel practical.
A video can feel casual and visual.
Same idea.
Different shape.
That is the rhythm you want.
Mistake 2: Repurposing a Weak Post Too Soon
If the original blog post is unclear, the smaller pieces will also feel unclear.
Start with your strongest, simplest posts.
A good post should have:
- one reader
- one main problem
- one clear lesson
- one useful next step
If the article feels scattered, improve the post first.
Then repurpose it.
A weak post does not become stronger just because it becomes five weak pieces.
Mistake 3: Making Every Smaller Piece Too Long
A short content piece should stay short.
Do not turn every email into a full article.
Do not turn every social post into a full lesson.
Give the reader one useful idea.
Then invite them to the full post if they want the deeper guide.
This keeps your content light, helpful, and easy to follow.
Mistake 4: Forgetting the Reader’s Next Step
Every content piece should lead somewhere.
The next step may be simple:
- read the full guide
- try one tip
- save the checklist
- reply with a question
- visit a related resource
- log in to the members area
If the reader thinks, “That was helpful, but what now?” you have missed a small but important chance to guide them.
Quick Exercise: Repurpose Your Next Blog Post
Before you move on, choose one blog post or one article idea.
Then fill in this simple plan.
My Blog Post Title Is:
[Write your title.]
The Main Lesson Is:
[Write the key idea.]
One Email Angle Could Be:
[Write a short email idea.]
Three Social Post Ideas Could Be:
- Pain point: [Write idea.]
- Quick tip: [Write idea.]
- Mistake: [Write idea.]
One Checklist Idea Could Be:
[Write checklist title.]
One Video or Audio Idea Could Be:
[Write simple talking point.]
You do not need to finish every piece in one sitting.
Just map them first.
Once you see the pieces inside one post, content planning starts to feel lighter.
A lot lighter.
Final Thought: Let One Good Idea Travel Further
You do not always need more ideas.
Sometimes you need to use one good idea with more intention.
A blog post can become an email, a few social posts, a checklist, a quick tip, or a simple video idea.
That means your content does not have to sit quietly after you publish it.
Let it travel.
Let it meet readers in different places.
Let it work a little harder for you.
Start with one useful post.
Just one.
Then ask:
How else can I share this lesson?
That one question can turn content creation from “What on earth do I post next?” into a calmer, simpler rhythm.
Use This With Blogger’s Success Toolkit
If you already own Blogger’s Success Toolkit, this is a good time to log back in to the Blogger Success Blueprint members area and use the planning resources inside the Toolkit.
Do not just collect the files.
Put one of them to work on your next post.
Members Login:
https://bloggersuccessblueprint.com/members/
New to Blogger’s Success Toolkit?
Blogger’s Success Toolkit gives you a beginner-friendly path to choose your direction, plan useful content, write stronger titles, and begin building your blog with more structure.